Coil on Plug MOD
#1
Coil on Plug MOD
This is my version of the Coil on spark plug MOD.. It's not new, it's not leading edge, it's not needed if your OEM coils, wires, spark plug cap are in serviceable condition.
BUT if you need to replace any of the OEM parts, or just have a desire to do a useful easy mod.... Then the CBR coil on plug MOD might be for you.
My donor parts were from 2006 CBR1000. I purchased a set of coils and the wiring harness on eBay for under $60 delivered to my door.
30 minutes of stripping tape and OEM harness cover and I ended up with four separate plugs and wire pigtails.
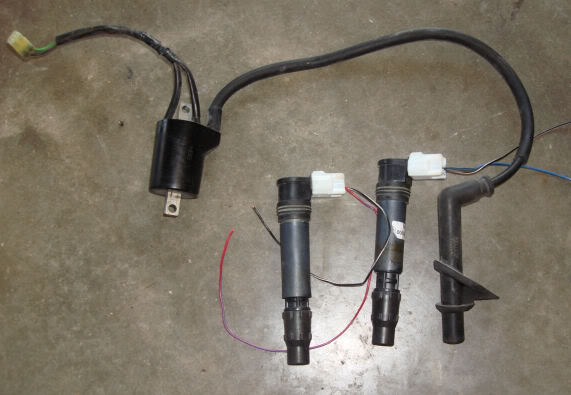
I cut the plug from the OEM coil and attached it to the new harness plug.
Connections are soldiered, heat shrink tube and liquid electrical tape used to seal connections.
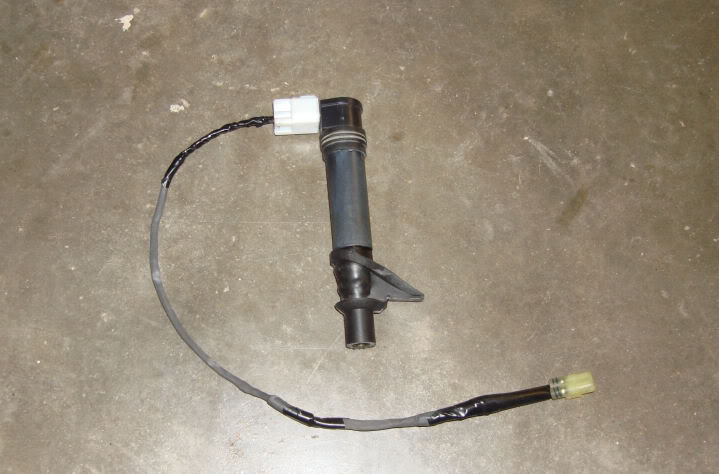
Several have done this MOD and worked though the issue of how to provide a seal to the head. I chose to do it the OEM Like way.. I cut the rubber OEM plug section off the OEM plugs, removed the lower rubber section of the CBR coils,
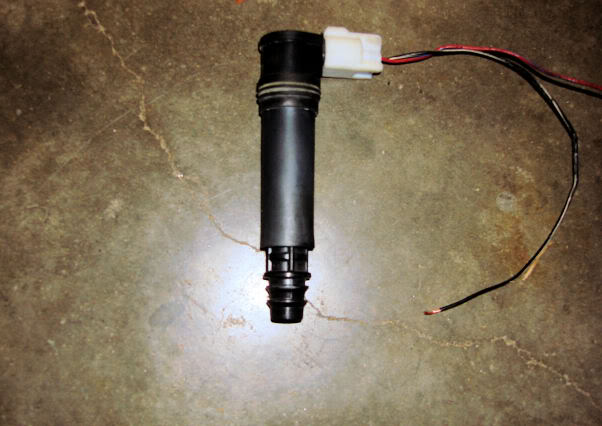
and fit the VTR section of rubber plug to the CBR coil on plug.
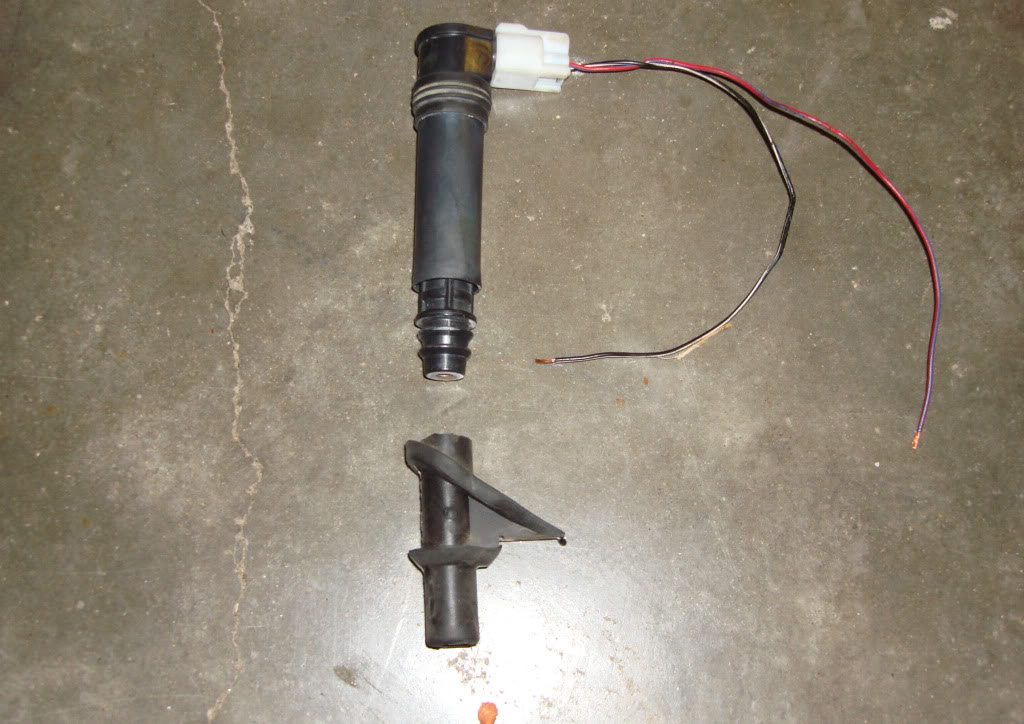
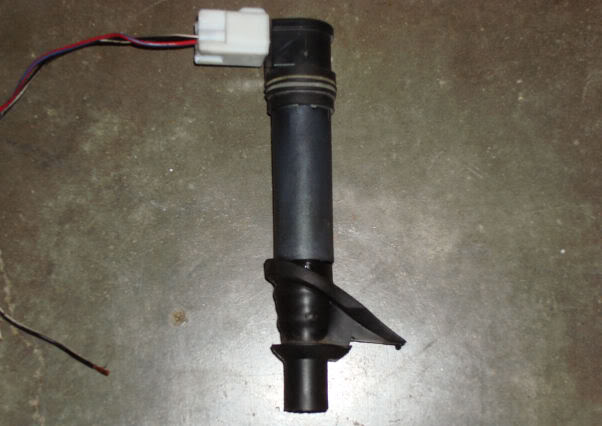
Once both the coils are wired to the old plug, the rubber section has been added to the lower part of the coil ...install them in place
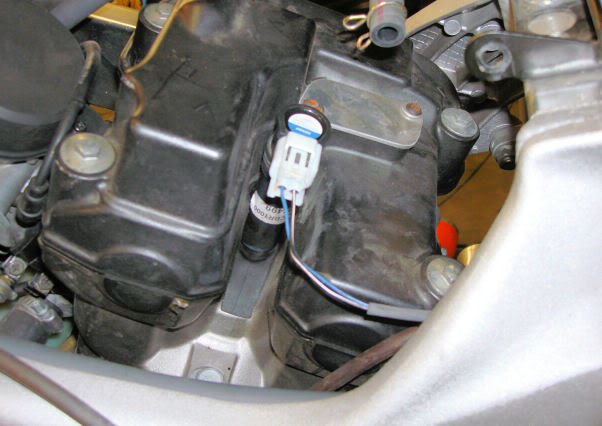
Put everything else back together, and go test ride.
BUT if you need to replace any of the OEM parts, or just have a desire to do a useful easy mod.... Then the CBR coil on plug MOD might be for you.
My donor parts were from 2006 CBR1000. I purchased a set of coils and the wiring harness on eBay for under $60 delivered to my door.
30 minutes of stripping tape and OEM harness cover and I ended up with four separate plugs and wire pigtails.

I cut the plug from the OEM coil and attached it to the new harness plug.
Connections are soldiered, heat shrink tube and liquid electrical tape used to seal connections.

Several have done this MOD and worked though the issue of how to provide a seal to the head. I chose to do it the OEM Like way.. I cut the rubber OEM plug section off the OEM plugs, removed the lower rubber section of the CBR coils,

and fit the VTR section of rubber plug to the CBR coil on plug.


Once both the coils are wired to the old plug, the rubber section has been added to the lower part of the coil ...install them in place

Put everything else back together, and go test ride.
Last edited by E.Marquez; 10-01-2014 at 04:45 AM.
#3
I figured why not. I had already cut the plug from the OEM coils, I knew that if this coil on cap setup failed, I was not going back to OEM coils,,, and I found the stock plug cap rubber outer cover was not glued or otherwise molded to the body of the cap.
2 sec with a razor, off it came.
You do have to trim it though to fit. Over all length from spark plug connection to the end of the rubber cap is too long with the OEM seal installed on the CBR coil cap.
Trim the top of the seal as close as possible on top, install on the CBR coil. You can measure the difference of seating depth between an OEM cap and the CBR cap with an old plug or small dowel, rod 1/4 drive extension, etc.. You'll see the difference being about 5mm. Trim that off the seal installed on the CBR cap.
You will also notice the CBR cap is larger in diameter. The scavenged seal withs no problem,, BUT then the new installed diameter of the seal is a bit too much for the recess in the head.
So trim 2-3 mm around the circumference and it will now fit in the spark plug recess just like OEM.
Add a dab of dielectric silicone to the inside of the spark plug cap and your all set
I always spray the outside of a spark plug boot / seal with silicone spray to both keep it from sticking at next removal, and to help repel water. In this case it also makes sure the seal/cap fit in the recess easy.

#4
I went about using the OEM seal on the stick coil a little differently.
Rather than trim the seal, I ground the end of the coil until all of the ridges, etc. were gone and I had a nice round end for the seal. Same result, the spark plug well is sealed from whatever.
I first thought of trimming the coil in my lathe, but the connector wouldn't allow the coil to run centered.....I guess that's my excuse for getting a larger lathe.
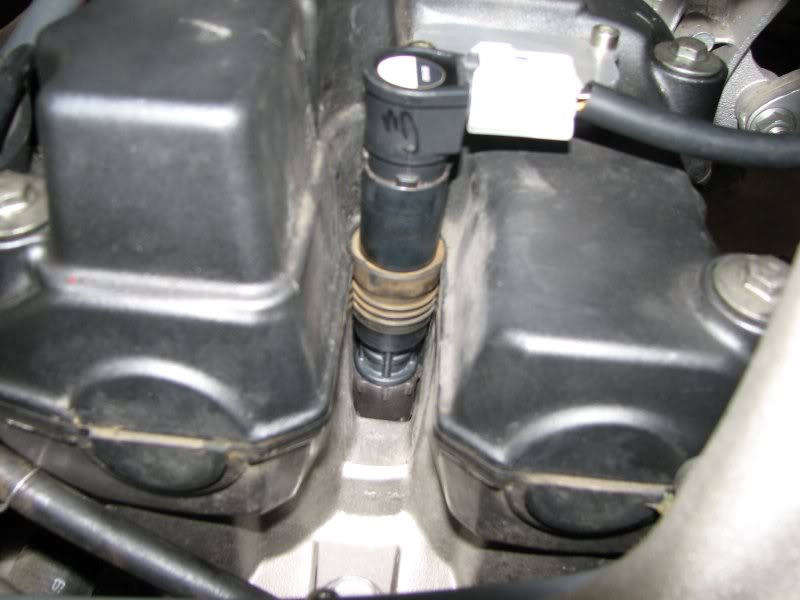
During preliminary fit up I noticed that the coil, even with the OEM seal in place, would wobble a bit. By sliding the upper seal of the stick coil down the body of the coil 35mm (1.375" if you're metrically challenged), the seal nestles into the joint of the cam cover and the cylinder head, eliminating any wobble.
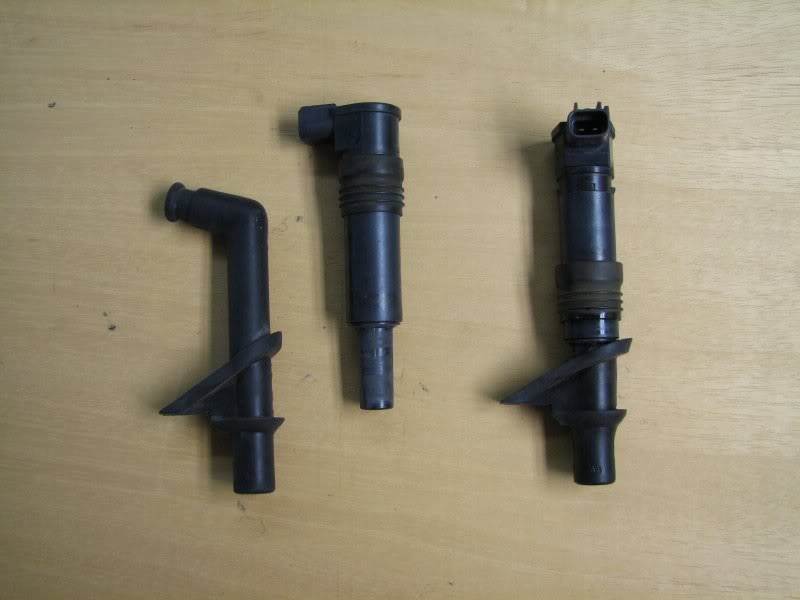
This pic is the coil work in progress:
This pic, from preliminary fit up, shows how the relocated upper seal seats at cover joint:
Rex
Rather than trim the seal, I ground the end of the coil until all of the ridges, etc. were gone and I had a nice round end for the seal. Same result, the spark plug well is sealed from whatever.
I first thought of trimming the coil in my lathe, but the connector wouldn't allow the coil to run centered.....I guess that's my excuse for getting a larger lathe.
During preliminary fit up I noticed that the coil, even with the OEM seal in place, would wobble a bit. By sliding the upper seal of the stick coil down the body of the coil 35mm (1.375" if you're metrically challenged), the seal nestles into the joint of the cam cover and the cylinder head, eliminating any wobble.
This pic is the coil work in progress:

This pic, from preliminary fit up, shows how the relocated upper seal seats at cover joint:

Rex
Last edited by bjorn toulouse; 06-26-2010 at 09:56 AM. Reason: speelage
#5
Nice work ...
I chose not to grind the coil (or chuck it up in the lathe) because I was not sure how fragile the body or electrics were.
As you had no issue I guess I could have.
Nice to have choices.
I chose not to grind the coil (or chuck it up in the lathe) because I was not sure how fragile the body or electrics were.
As you had no issue I guess I could have.
Nice to have choices.
#6
#8
The common colour is ground, I believe it's black with a white stripe... Should be on both coils, the other wire should be different colours and are the "hot" one... But I'm fairly certain it's no problem if they are hooked up inverse...
#13
Also, to be straight, we are eliminating this: RED, and using this: GREEN, on each cylinder. Sorry for being dumb, I just want to make sure I have this right. Also, I want to use 600rr sticks, does it matter which years?
#14
Everything you circled can be tossed (as well as the plug that it plugs into on your stock harness). The wires coming from the plugs on your coils should just splice into the wires on your VTR harnass.
In essence, you're replacing everything behind the plug on your VTR with the plug that goes directly into the coil. Year doesn't matter as long as you can fit it onto your plugs when they're installed.
I also don't think that the wires matter. It's just completing a circuit so order wont effect anything. You probably have a green to a green for ground, though, so do that if it's there. Easier than you thought, eh?
Edit: FWIW I just checked wiring, and green is ground on the VTR so find a diagram for a 600rr and match the grounds up. Good chance it's the black/white wires judging by your picture.
Last edited by 7moore7; 01-30-2012 at 09:01 PM.
#15
the only thing reused from the OEM setup is the two wire plug, which is cut from the old coil and wired to the cap on plug coil
#18
Hi guys, I am from the german VTR forum, where one of our members linked this thread here. I am happy to say that this coil on cap mode works perfectly, I have just built it how it is described here.
Therefore I would like to say thank you all, especially Marquez
Therefore I would like to say thank you all, especially Marquez

#19
What it does is clean up the area somewhat, trims some weight off, updates the ignition coil system to something current.
#21
The COP mod is a Coil On Plug swap for the separate coil and plug OEM design... ie the coil is integrated in the plug. You do not use coils AND the denso COP
Last edited by E.Marquez; 10-01-2014 at 04:46 AM.
#22
sorry,I meant it to say it is the coil on cap mod.
the gsxr coil on cap is the same as cbr600rr,just different resistance.
the gsxr is a denso 129700-4150 J0396
was wondering the lowest resistance i could go for the hawk.the gsxr COP is at 1.3 to 1.5/1.6
the gsxr coil on cap is the same as cbr600rr,just different resistance.
the gsxr is a denso 129700-4150 J0396
was wondering the lowest resistance i could go for the hawk.the gsxr COP is at 1.3 to 1.5/1.6
#24
now i just gotta get the cbr denso plugs,seeing that it seems that you cant get them from a gsxr,i think its all in the same loom.
thanks.
#25
well,i finally got to do the coil mod,and i got to say,so far,a very good result.did everything in the instructions,easy,straight forward.
I matched the wires,soddered them,taped them,used heat shrink and used the original rubber sheild off the old coil wires.very clean look.
the only difference to this is i used a gsxr COP denso 129700-4150 J0396
it is the exact same as a cbr COP,only difference is the COP is shorter on the gsxr.
i have been using so far with good results,so now there is more options and cost to do this setup.
now hopefully i could get some riding in to see if there is a difference in gas mileage.
#26
I have a couple late breaking questions about this mod.
Can I use cbr600 parts? Also, did you solder right to the pins/posts on the coils?
I would want to get the cbr harness also to use watertight factory plugs.
So yeah, does the cbr600 create the same or enuff spark ?
Can I use cbr600 parts? Also, did you solder right to the pins/posts on the coils?
I would want to get the cbr harness also to use watertight factory plugs.
So yeah, does the cbr600 create the same or enuff spark ?
#27
I have a couple late breaking questions about this mod.
Can I use cbr600 parts? Also, did you solder right to the pins/posts on the coils?
I would want to get the cbr harness also to use watertight factory plugs.
So yeah, does the cbr600 create the same or enuff spark ?
Can I use cbr600 parts? Also, did you solder right to the pins/posts on the coils?
I would want to get the cbr harness also to use watertight factory plugs.
So yeah, does the cbr600 create the same or enuff spark ?
#29
I also have 2 left
08/09 CBR1000RR
maybe for someone in europe
ive got an amazing deal on these so 15 dollars to the first one who wants them ? only shipping might be a pain maybe someone has something to trade ?
08/09 CBR1000RR
maybe for someone in europe
ive got an amazing deal on these so 15 dollars to the first one who wants them ? only shipping might be a pain maybe someone has something to trade ?
#30
I have a couple late breaking questions about this mod.
Can I use cbr600 parts? Also, did you solder right to the pins/posts on the coils?
I would want to get the cbr harness also to use watertight factory plugs.
So yeah, does the cbr600 create the same or enuff spark ?
Can I use cbr600 parts? Also, did you solder right to the pins/posts on the coils?
I would want to get the cbr harness also to use watertight factory plugs.
So yeah, does the cbr600 create the same or enuff spark ?
NO, I did not solder wires to the coil pins, nor do most others far as I know.
You buy a used harness....and re-use the plugs, or buy new plugs.. you can get them at any automotive store as replacement parts for hundreds of different car models


