What did you do with your SuperHawk today?
 01-28-2017, 11:09 PM
#2041
Senior Member
SuperBike

Join Date: Mar 2012
Location: New South Wales Australia
Posts: 1,544

fastguy,
Message them, they are good people and used to do low mounts .
Maybe they can knock you up a pair.
I have purchased a few items from them.
They are easy to deal with.
Cheers From Down Under.
Message them, they are good people and used to do low mounts .
Maybe they can knock you up a pair.
I have purchased a few items from them.
They are easy to deal with.
Cheers From Down Under.
 01-28-2017, 11:36 PM
#2042
Senior Member
Back Marker

Join Date: Apr 2010
Location: Prague - Czech
Posts: 219
01-31-2017, 01:07 PM
#2043
Senior Member
Back Marker
Join Date: Apr 2010
Location: Prague - Czech
Posts: 219
01-31-2017, 11:15 PM
#2045
Senior Member
SuperBike
Join Date: Mar 2012
Location: New South Wales Australia
Posts: 1,544
That's great news.
They really are a quality product and well worth the $
I wish they did more for our bikes.
Would like to see some pics when you get them fitted.
Cheers From Down Under
They really are a quality product and well worth the $
I wish they did more for our bikes.
Would like to see some pics when you get them fitted.
Cheers From Down Under
02-06-2017, 08:47 AM
#2046
Senior Member
Superstock

Join Date: Aug 2016
Posts: 345
Finally got it right. I broke down and braved the cold long enough not really today but a few days ago. I got the oil done. clutch fluid bled and flushed. Chain lubed. Tire aired up. And I finally Balanced up the carbs. I used a piece of breakaway chain to redneck measure it. The ball was too small so it would bounce around at idle was hard to get a reading but it kept sticking to the front. The front carb was wayyy out from the back. Put my idle back to where it should be. Too bad because she would start no choke in negative weather now I need the choke lol. ( Its a joke.)
But it was so out that I really didnt need to choke it..
I also went online and got my vinyl ester. I have four sheets of cf twill. Besides all that I am stranded as I cant find a welder or supplier of aluminum pipe.
Did take her out for a romp. Its been out so long I have not had the nut to give her hell in first or second. Plus all the ice. But third pulls like a bear again.
Oh not really the hawk but I finally got good boots along with a splitable shoei helmet. I dunno if you guys know but I was riding in running shoes....
02-12-2017, 09:24 PM
#2052
Senior Member
SuperBike
Join Date: Mar 2012
Location: New South Wales Australia
Posts: 1,544
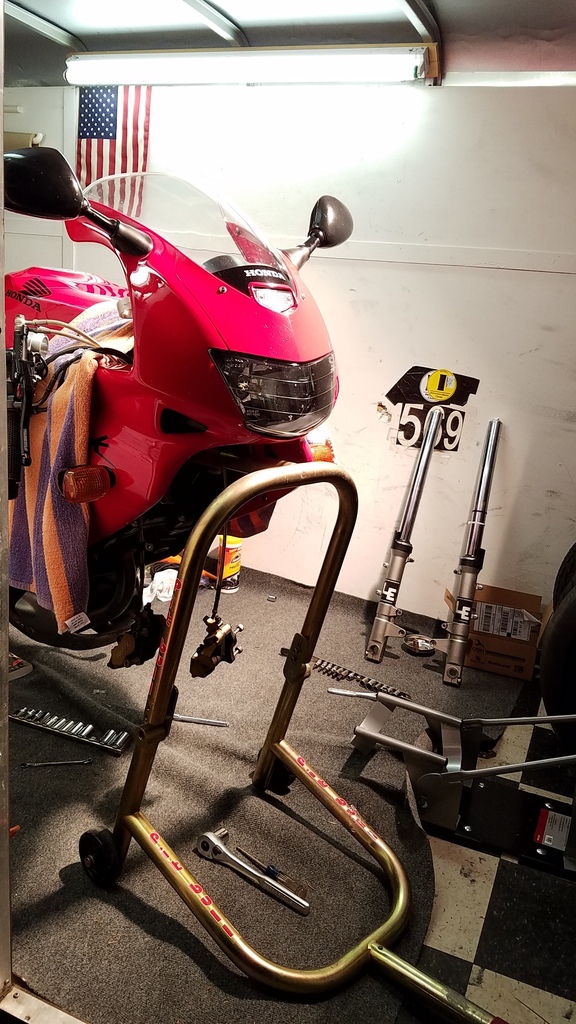
The spanner is used to adjust the bearings.
When I did mine I fitted tapered bearings and adjusted them after about 300 Klms to get them right as they were a bit loose after riding a couple of times.
No problems since.
Also be aware that you best adjust the bearings with the wheel off the ground and you are aiming for no movement when you grab the forks and that the bars fall easily to the right and left.
The tapered bearings made a huge difference to my bike.
02-13-2017, 06:30 AM
#2053
Senior Member
SuperBike

Join Date: Sep 2010
Location: Bisbee, AZ
Posts: 1,920
02-13-2017, 07:09 AM
#2054
Member
Squid

Join Date: Jun 2015
Posts: 60
The spanner is used to adjust the bearings.
When I did mine I fitted tapered bearings and adjusted them after about 300 Klms to get them right as they were a bit loose after riding a couple of times.
No problems since.
Also be aware that you best adjust the bearings with the wheel off the ground and you are aiming for no movement when you grab the forks and that the bars fall easily to the right and left.
The tapered bearings made a huge difference to my bike.
When I did mine I fitted tapered bearings and adjusted them after about 300 Klms to get them right as they were a bit loose after riding a couple of times.
No problems since.
Also be aware that you best adjust the bearings with the wheel off the ground and you are aiming for no movement when you grab the forks and that the bars fall easily to the right and left.
The tapered bearings made a huge difference to my bike.
02-14-2017, 07:17 AM
#2055
n( . )( . )b
Squid

Join Date: Jan 2017
Location: Apex, NC
Posts: 40
Some dim bulb re-wired the headlight incorrectly, manifest as current going through the high beam circuit all the time, so I re-wired it correctly and replaced a couple of tiny bulbs in the instrument cluster. This bike is well sorted and running great! I bought the wife a nice leather jacket and myself a new Shoei GT Air and went for a long ride. So needed that.
02-15-2017, 11:02 PM
#2056
Senior Member
Back Marker
Join Date: Apr 2010
Location: Prague - Czech
Posts: 219
delivered quite fast. Hope it will fit with your nice angle of pipes :-) I am sure there will be nice weight saving too.
 02-16-2017, 08:33 AM
#2058
Moderator
MotoGP

Join Date: Jul 2007
Location: Gettysburg, Pa
Posts: 5,109
I didn't use a special tool either, not 100% necessary. The book says:
STEERING BEARING PRELOAD
Remove the front fairing (page 2-3).
Support the motorcycle securely using safety
stands or a hoist and raise the front wheel off the
ground.
Position the steering stem to the straight ahead position.
Hook a spring scale to the fork tube between the
fork top and bottom bridges.
Make sure that there is no cable, wire harness or
hose interference.
Pull the spring scale keeping it right angle to the
steering stem.
Read the scale at the point where the steering stem
just starts to move.
STEERING BEARING PRELOAD:
1.0-1.6 kgf(2.2-3.5Ibf)
If the readings do not fall within the limits, readjust
the steering bearing adjustment.
Follow up with a recheck after some hours ride time.
 02-17-2017, 10:55 AM
#2061
Senior Member
SuperBike
Join Date: Mar 2012
Location: New South Wales Australia
Posts: 1,544
Fastguy,
That's a great solution .
Your attention to detail is to be admired. At the moment my remotes just lie in the V between the cylinders, but not for long after seeing this.
That's a great solution .
Your attention to detail is to be admired. At the moment my remotes just lie in the V between the cylinders, but not for long after seeing this.
02-17-2017, 12:00 PM
#2062
Senior Member
Superstock
Join Date: Nov 2014
Location: Middletown, CT
Posts: 416
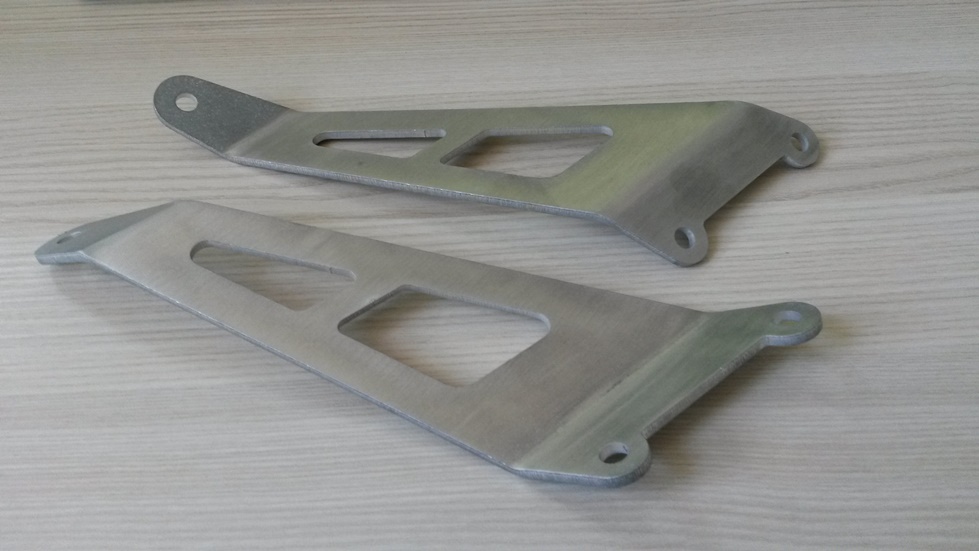
So just a couple of notes: I used 3/16" thinwall aluminum hobby tubing for the two thru tubes. They are soldered (with Eastwood Co. Aluminum Solder) into two 3/16" holes drilled through the lower fairing stay. Be warned you must have the frame side bolt/fastener inserted into the fairing support bracket BEFORE you solder the tubes in, no clearance afterwards... Don't ask me how I know...
Last edited by Fastguy59; 02-17-2017 at 12:37 PM.
 02-20-2017, 02:50 AM
#2065
Senior Member
Superstock
Join Date: Aug 2016
Posts: 345
Not today.
but As you all know I got the bike sorted but got told I dont have a liscence here. that dont stop me from riding in town and on the trails. But I also am using it as time to get the new ti pipes and carbon tank sorted.
I got the shape molded but I have to clean up the part. Shes dry on one side. I wasnt liberal enough with the roller. Next time brush all the way.
I am looking for suggestions on molding the bottom of the tank. I plan on vaccum bagging it but I need another sheet as all I have is long strips from the top shell. Please post in my thread any ideas. I am thinking of building the airbox top into the tank and shaping it into an air ram with the litte splitter bar molded in.
I was also thinking about building cf float bowls out of fiber and vinylester because its gonna go bad if I dont use it up. < Please say no. I have a feeling its a bad idea. All I can think of is a fire ball.
Also just drove 20 hours to get the wife an a6 04 wuth the 3.2. half way home I herd the chain on startup at a rest stop.... I knew the tensioner was going to go because the oil looks like it hasnt been changed in forever... I took it home and dumped some cheap oil in.... Its blacker than a coalminers lung already. Just from fill up... I dunno but it could be because I had to reuse the oil filter. I did wash it with kero and a new ones on the way. I think mes gonna change oil again this month but with some good stuff.
btw the audi dealer needed the vin to find the filter.... all a6 3.2 engines use the same filter. I know I was an audi mechanic...
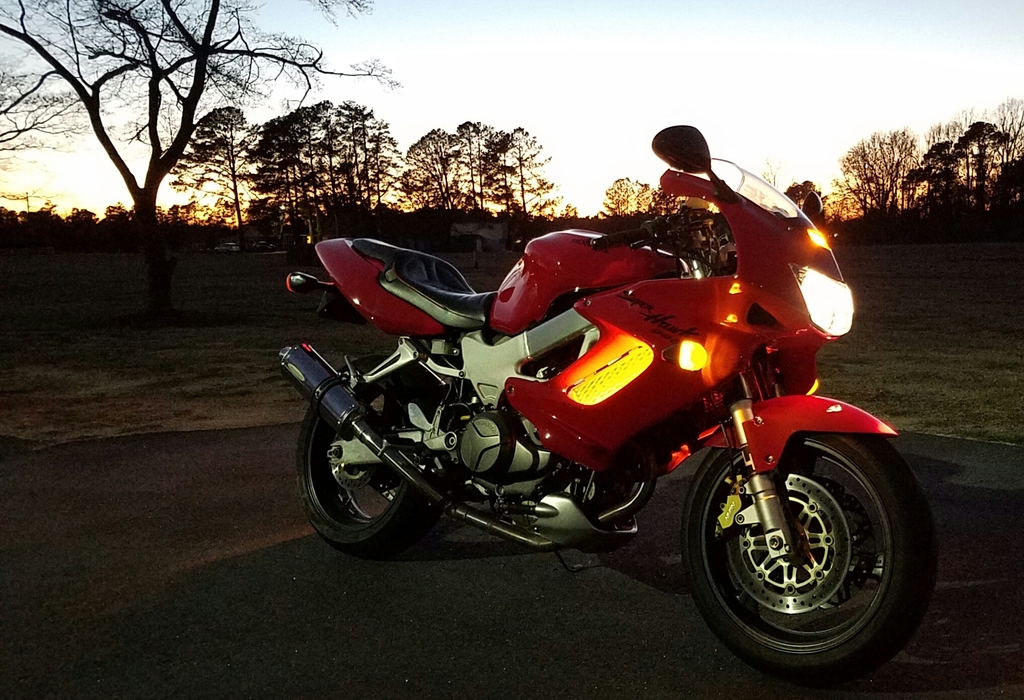
Vtr runs great!
I got the shape molded but I have to clean up the part. Shes dry on one side. I wasnt liberal enough with the roller. Next time brush all the way.
I am looking for suggestions on molding the bottom of the tank. I plan on vaccum bagging it but I need another sheet as all I have is long strips from the top shell. Please post in my thread any ideas. I am thinking of building the airbox top into the tank and shaping it into an air ram with the litte splitter bar molded in.
I was also thinking about building cf float bowls out of fiber and vinylester because its gonna go bad if I dont use it up. < Please say no. I have a feeling its a bad idea. All I can think of is a fire ball.
Also just drove 20 hours to get the wife an a6 04 wuth the 3.2. half way home I herd the chain on startup at a rest stop.... I knew the tensioner was going to go because the oil looks like it hasnt been changed in forever... I took it home and dumped some cheap oil in.... Its blacker than a coalminers lung already. Just from fill up... I dunno but it could be because I had to reuse the oil filter. I did wash it with kero and a new ones on the way. I think mes gonna change oil again this month but with some good stuff.
btw the audi dealer needed the vin to find the filter.... all a6 3.2 engines use the same filter. I know I was an audi mechanic...
Vtr runs great!
 02-21-2017, 09:12 AM
#2067
n( . )( . )b
Squid
Join Date: Jan 2017
Location: Apex, NC
Posts: 40
They're just inside the lower lip of the opening, and they may or may not survive very long. I'm an experimenter!
02-22-2017, 06:40 AM
#2068
Senior Member
SuperBike
Join Date: Sep 2010
Location: Bisbee, AZ
Posts: 1,920
Yeah, run it till it breaks, that's my moto.