Teardown and Rebuild
#62
Hahaha! Such an amazing support group- I'll be sure to come here if I become an alcoholic and AA isn't enough.
Continuing working through my parts as I wait for the powdercoating to be finished. I should pick all my pieces up Friday and maybe have time Sunday to bolt some stuff on. I figured out a way to get the frame bolts torqued correctly w/out needing to buy Honda's tool- use a mechanic. Haven't done that yet so it didn't occur to me .
.
Anyway, one of the boneheads who owned this bike before painted EVERYTHING black. And poorly. I'm all for black bikes, but IMO they should have different textures/qualities. Flat black mixed with anodized metal and that sort of thing.
Made an amazing discovery in that the paint stripper didn't take off any of the caliper paint, but took off all of the PO's paint.
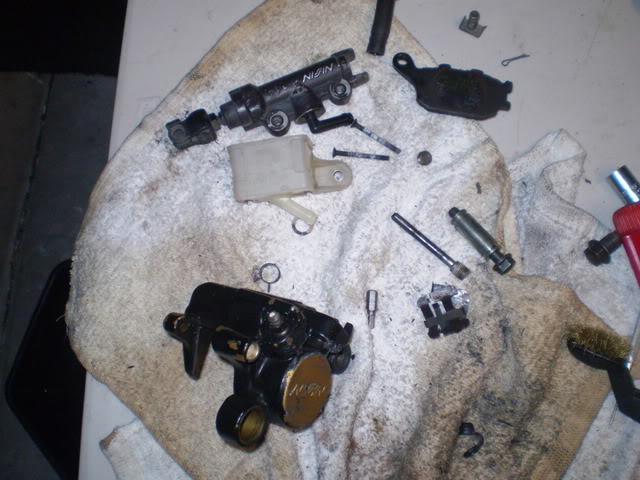
So I cleaned everything up and put a nice new coat of engine enamel on!
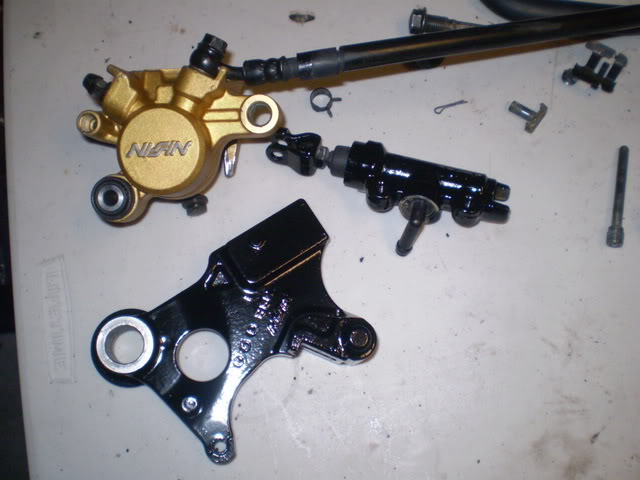
One of the slides or whatever it was called was rusted shut, which explains the uneven brake wear and poor performance of them while they were on. All cleaned up now. And new pads on the list...
Continuing working through my parts as I wait for the powdercoating to be finished. I should pick all my pieces up Friday and maybe have time Sunday to bolt some stuff on. I figured out a way to get the frame bolts torqued correctly w/out needing to buy Honda's tool- use a mechanic. Haven't done that yet so it didn't occur to me
Anyway, one of the boneheads who owned this bike before painted EVERYTHING black. And poorly. I'm all for black bikes, but IMO they should have different textures/qualities. Flat black mixed with anodized metal and that sort of thing.
Made an amazing discovery in that the paint stripper didn't take off any of the caliper paint, but took off all of the PO's paint.

So I cleaned everything up and put a nice new coat of engine enamel on!

One of the slides or whatever it was called was rusted shut, which explains the uneven brake wear and poor performance of them while they were on. All cleaned up now. And new pads on the list...
#63
Front brake caliper:
not quite as nice, but better than it was...
Good news is, now I don't have to be warned to use DOT 4 fluid from a sealed container anymore! Now I imagine I'll just throw in Pepsi, 'cause the carbonation will just bleed itself out the top...
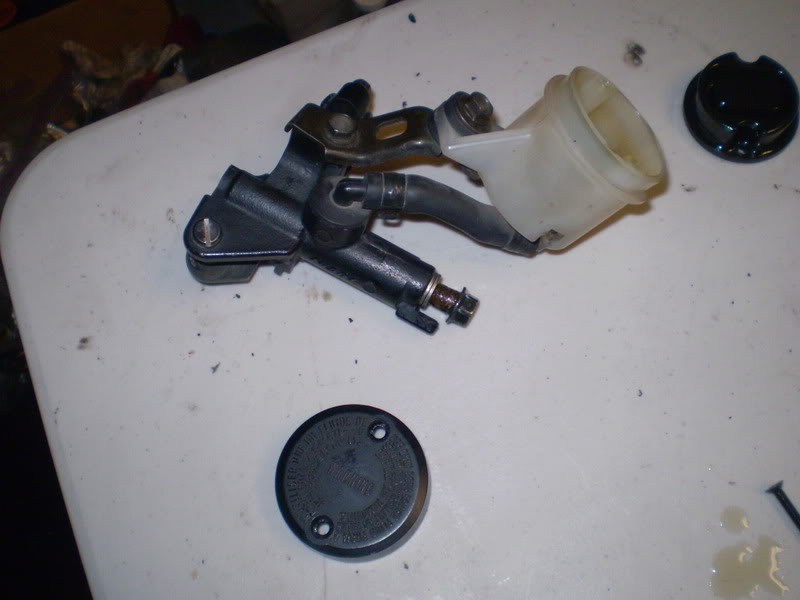
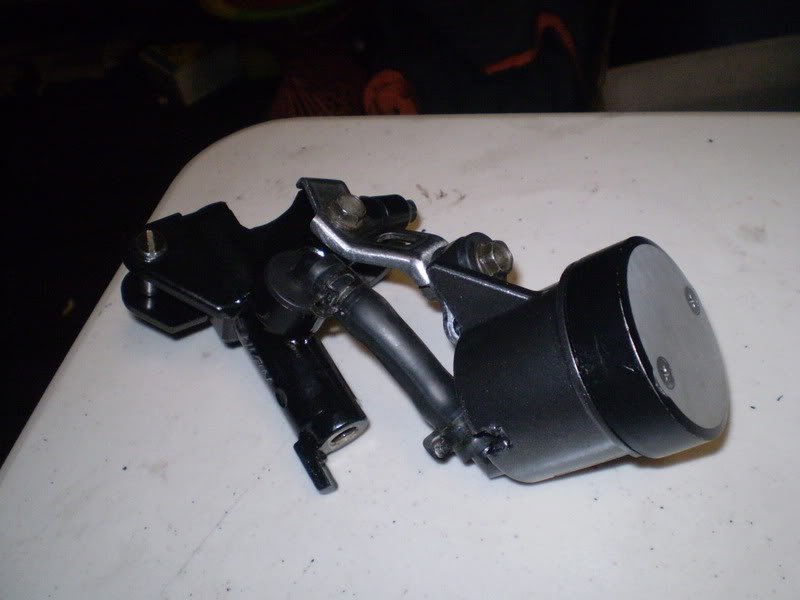
not quite as nice, but better than it was...
Good news is, now I don't have to be warned to use DOT 4 fluid from a sealed container anymore! Now I imagine I'll just throw in Pepsi, 'cause the carbonation will just bleed itself out the top...


#64
Powdercoated parts trickling in... and they look better than I expected. I stopped by the place to check in on Saturday and it's a good thing I did because they mixed my two small odds'n'ends boxes up and painted some the wrong color. Caught the mistake before they put a second color though and they were very cool about correcting the problem. To be honest it could have been my fault- I didn't label the boxes and I have been known to make bigger switch-ups than that!
Color name: Anthracite
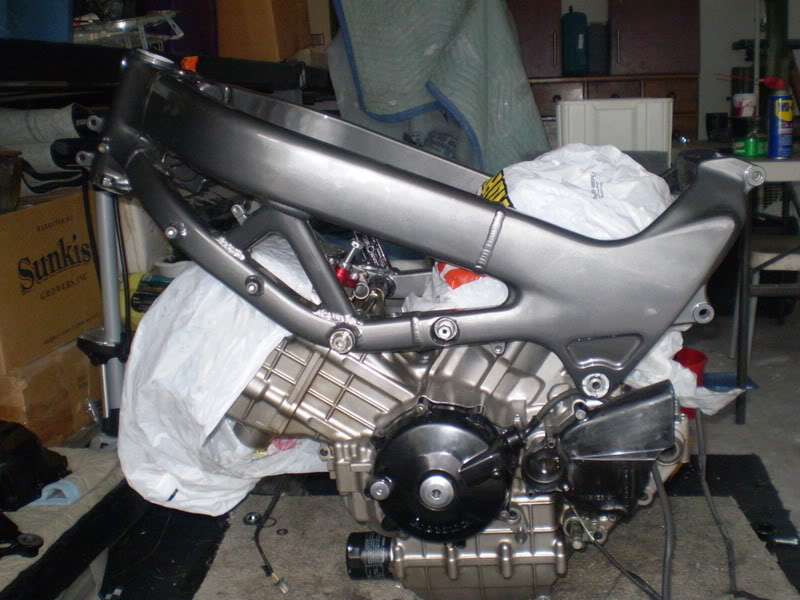
So my next few steps are: Have my mechanic press bearings into the wheels, swingarm and triple tree and put tires on the wheels. Bolt everything together to make a rolling chassis, then take it to him to have everything torqued up correctly b/c he has the proper tools to do it. He said it's all meant to be torqued with the stuff on it too. Does this sound right?
Color name: Anthracite

So my next few steps are: Have my mechanic press bearings into the wheels, swingarm and triple tree and put tires on the wheels. Bolt everything together to make a rolling chassis, then take it to him to have everything torqued up correctly b/c he has the proper tools to do it. He said it's all meant to be torqued with the stuff on it too. Does this sound right?
#66
I was distracted when I was talking to him a bit so I may be misinterpreting the conversation- It very well could have been that he wanted it all bolted together just so it would be easier to roll it on a truck and get it to him! On second thought... that would make more sense...
#67
I am still plugging away with my rebuild and mods.
Glad to see yours has progressed so well. I have most of my parts onsite now. Still waiting for a few more to get here. I will send you a picture of mine when it is finished.
Cheers, Walt
#70
He said it totally transformed the bike, particularly it's turn-in response on one side. Anecdotal, but he suspects the bike had the misalignment when he bought it.
Last edited by revhead1957; 11-22-2010 at 06:20 PM.
#71
I kinda say that tongue in cheek- I learned pretty quickly that if you guys don't approve of something you will voice it... I guess in a tough love sort of way....
On another tough note, I managed to break TWO blasted bolts today. Counting my blessings that I didn't strip anything but rediculously frustrating. Should have trusted myself when my torque wrench said "keep going" and I was thinking "no way". One was mounting the rotors and the other was the head covers.
I got one out with vice grips, but have never had to deal with this:
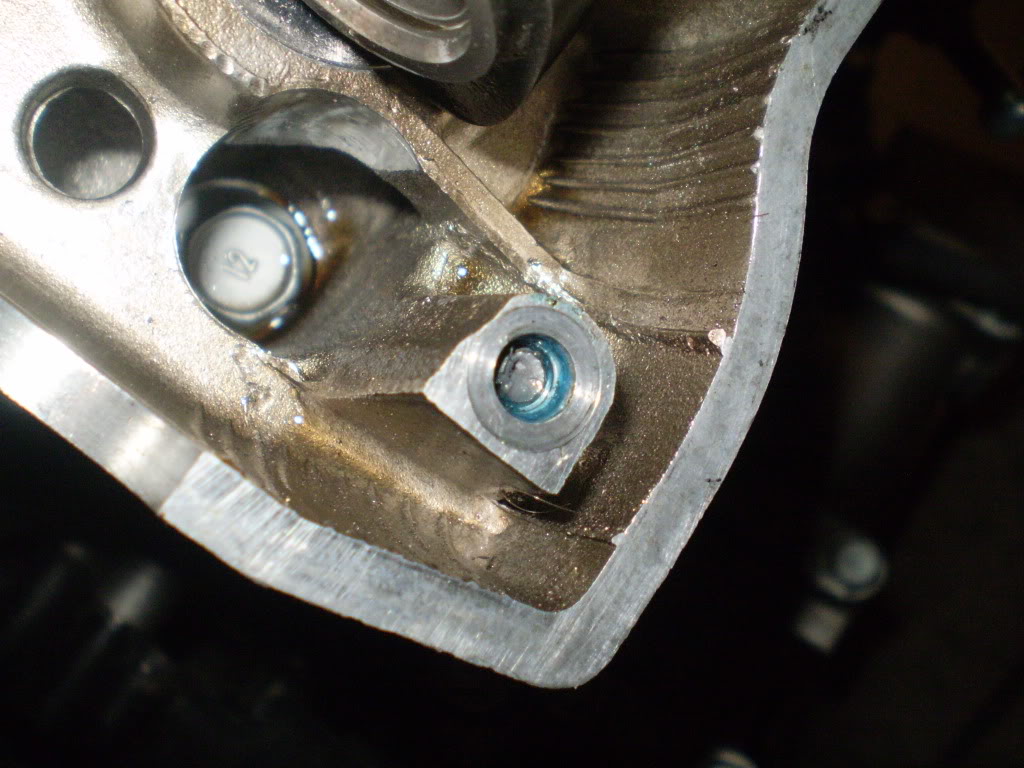
Really was a downer to the night because I was pumped to start bolting stuff on and it had been going so well... especially after having to wait so long for parts to get in.
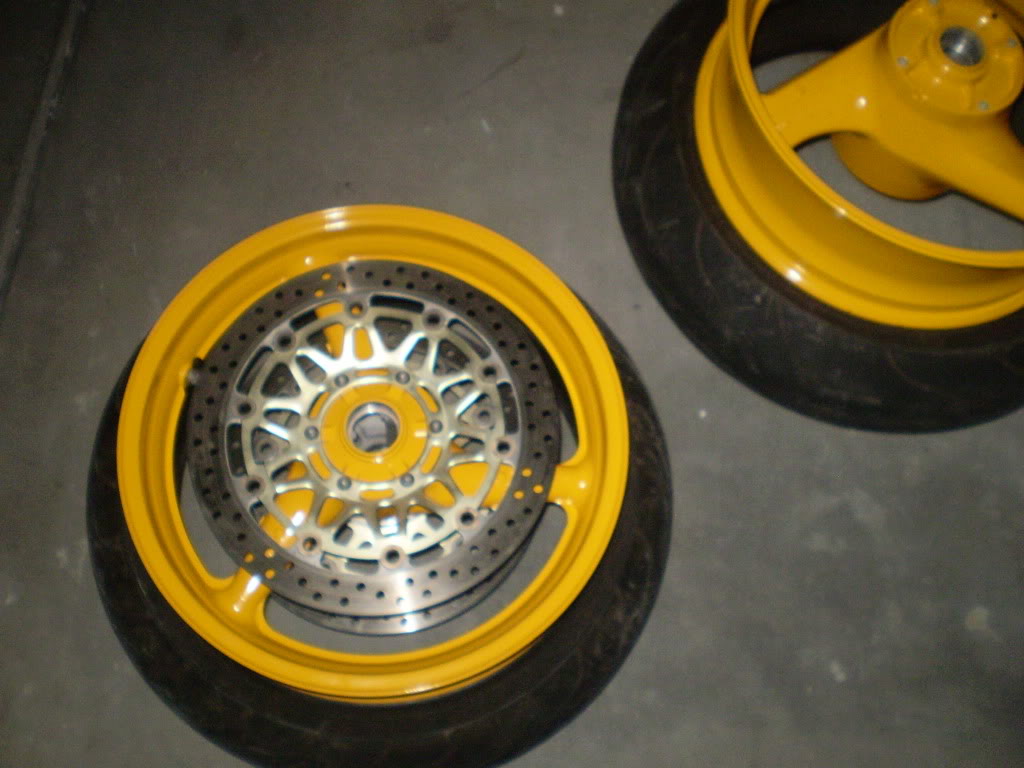
Here's the color for the wheels/accents. Went with yellow because upon a second reflection on doing teal, I thought I may not like it in a year or two... I was going to stay under the radar in the color battle, but I guess my inner preference has come out!
On another tough note, I managed to break TWO blasted bolts today. Counting my blessings that I didn't strip anything but rediculously frustrating. Should have trusted myself when my torque wrench said "keep going" and I was thinking "no way". One was mounting the rotors and the other was the head covers.
I got one out with vice grips, but have never had to deal with this:

Really was a downer to the night because I was pumped to start bolting stuff on and it had been going so well... especially after having to wait so long for parts to get in.
Here's the color for the wheels/accents. Went with yellow because upon a second reflection on doing teal, I thought I may not like it in a year or two... I was going to stay under the radar in the color battle, but I guess my inner preference has come out!

#73
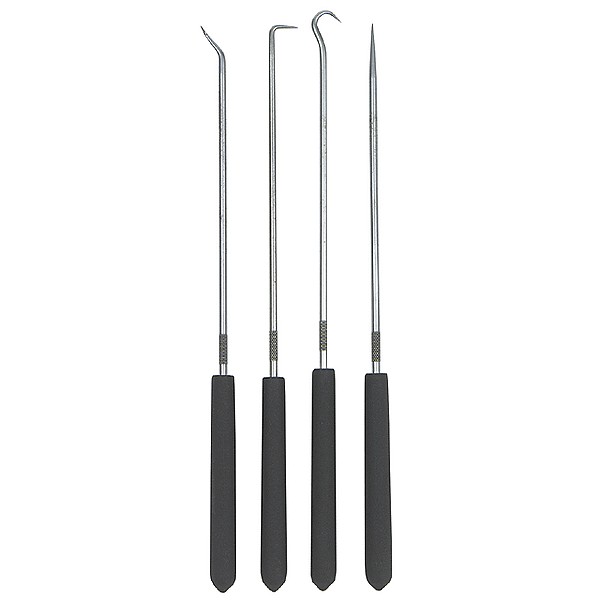
A small pick? Like a dental pick or somethin? I haven't really tried seeing how hard it would be to get out yet- I had to walk away and take a breather. Probably go at it again in a bit...
#74
Like these...
http://www.sears.com/shc/s/p_10153_12605_00947090000P
Just take your time with it and be careful not to booger up the threads.
Also, don't be gun shy about torquing stuff down now. I've got $20 that says that bolt was previously fatigued by whoever was in there before you. Once they over-torque it and stretch the bolt then the next round it will snap, especially since those have the shoulder they sit on.
http://www.sears.com/shc/s/p_10153_12605_00947090000P

Just take your time with it and be careful not to booger up the threads.
Also, don't be gun shy about torquing stuff down now. I've got $20 that says that bolt was previously fatigued by whoever was in there before you. Once they over-torque it and stretch the bolt then the next round it will snap, especially since those have the shoulder they sit on.
Last edited by inderocker; 11-23-2010 at 11:59 PM.
#75
if that blue stuff in the hole is lock tight, it ain't comin out with a pick. More likely you'll need am easy out. If you're having a mechanic press your bearings in, you might wanna ask him about getting an easy out.
#77
#80
I finally managed to work the bolt out- just kind of jammed a thin screwdriver (read: eyeglasses screwdriver) in there and worked it slowly catching the fragmented edges. Stripped the edges I was using but managed to get it far enough out to dremel a flat head into it and kept doing that till it came out. So now I'm just waiting on a new bolt.
lazn- I am using a Craftsman as well- keep it stored all the way loose and I think it still functions properly. The first one was user error- I mistranslated Nm as ft/lbs and proceeded to try to torque the rotor bolts on half again as much as they were supposed to be. Again, really relieved that the bolt broke and didn't strip the threads. Really kinda funny in retrospect... my roommate had quite a few friends over and it broke and I go "awww damn" and EVERYONE crowds around me and starts asking questions and trying to help and all I want is to sort out the situation in my own space!
The second one I'm not quite sure what happened- it could have been a few things: I was putting on the covers and was doing it one bolt at a time so may have put uneven stress on the bolt. I was also trying to do it with the frame on (it's back off now) and so was a little cramped for space. Could also have been what inderocker mentioned and a stretched bolt???
Whatever it was, it's out now and I'll try to keep torquing to spec but inderocker called it- I'm scared sh*tless of ruining this thing now because of last night's fiasco...
Main lesson Nm does not equal ft/lbs. Any of you guys trust me to bolt your bike together?!
Last edited by 7moore7; 11-24-2010 at 01:42 PM.
#81
Your build is looking good. You have to expect little speedbumps along the way but breaking off bolts is not a good one. Insure you have the correct bolt for the hole to avoid bottoming out or "shanking" out. A little LocTite goes a long way.
#83
Oooh..... you aren't supposed to have powdercoating on the bead area. That's a real bummer because I don't know of an easy way to remove it. It doesn't look like they masked off the rotor mounting areas either. Man, that sucks.
#84
They did mask off the rotor mounting areas, though, and did a pretty clean job of it. I took them in and started asking questions and he picked it up and he started showing me all the parts that they mask off, so I went with it. Also, beforehand I was a little curious about that so did some light research and it didn't seem to be a commonly masked of area. And by light research I mean I looked at a few pictures of rims and they were all painted except for the bearing surfaces and rotor mounting areas.
#86
Progress...
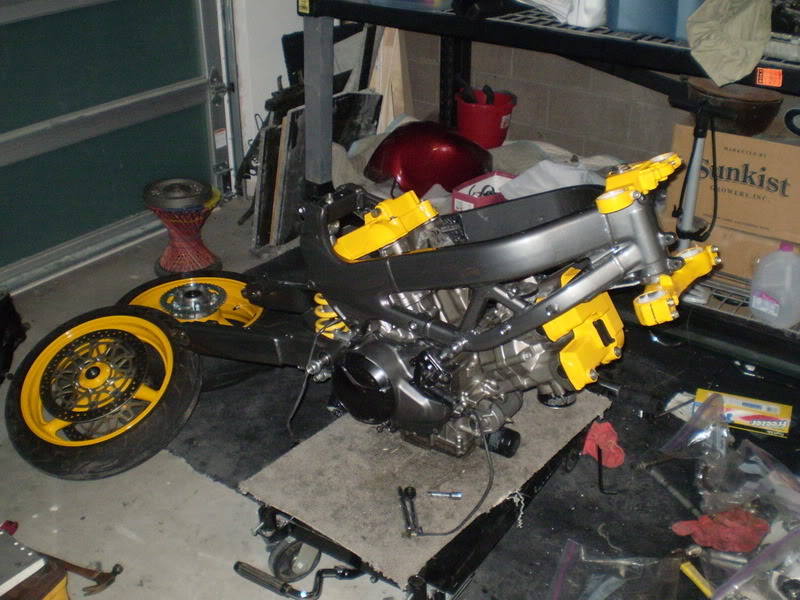
RWhisen, you were correct in saying the powdercoat was fine for the wheels... at least as far as other sources I checked. And also that the tires did mount to the rims with no issues so far.
Jamie, you were correct in saying they didn't mask off all of the rotor areas. I got in there today and noticed that one side of the rear wheel wasn't. Probably the one you saw in the picture. Little bit of aircraft paint stripper, anyone?
Had to clean all of the rear wheel hardware which took like 3 hours and didn't leave much time for assembly. Every step just taking chunks of time....
#90
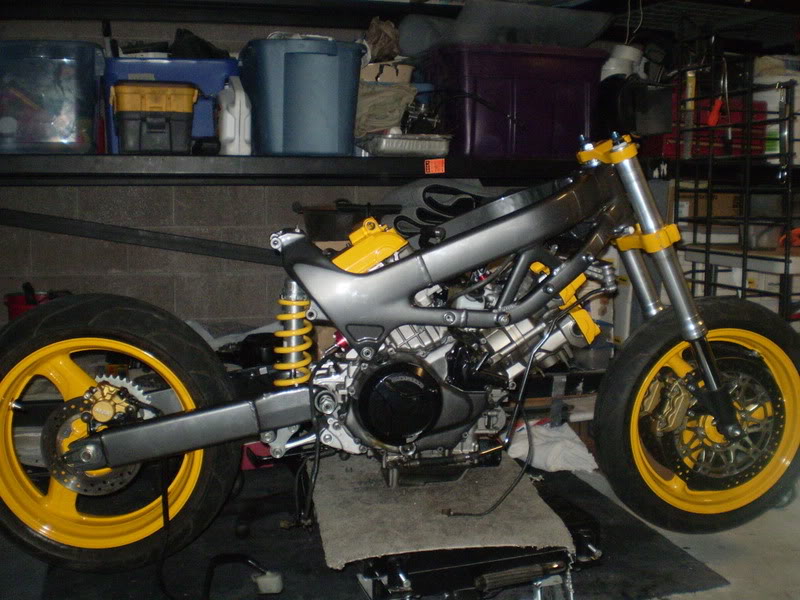
Thanks guys! Things are going to slow down again a little bit I suspect as I need to pick up the rest of my parts, work on the broken subframe, go to my day job, etc. But so far everything has fit together smoothly and I haven't seem to have lost any parts, which is suspicious; I never don't lose parts!
Anyway, it's far from being done, but I've learned a great deal from this forum- couldn't possibly remember everything:
Custom castle nut remover, powdercoating venue, silicon to preserve the hoses, moly grease, frame replacement, checking valve clearances, and that's just from this thread. CBR front end swap, CCT replacement, gearing, fastest color and those kinds of things I would not even have been able to come close to understanding without the people on here.


